The number of gorgeous images of tiny plants or insects is increasing, inspiring several photographers to learn how to create macro photography.
Although macro photography is among the fascinating styles you can experience, it isnt always simple, especially for novices.
Its best to learn everything related to this art, even the most minor details to become a macro photographer.
Click on this article to get a complete guide!
Table of Contents
What Is Macro Photography?
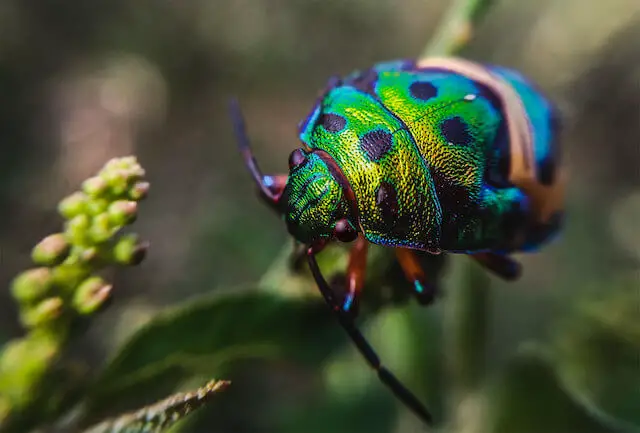
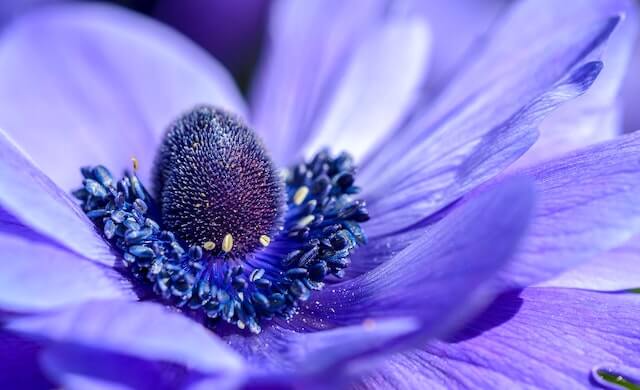
Macro photography is a distinctive kind of photography that includes taking pictures of tiny things to make them appear bigger or closer to their actual size.
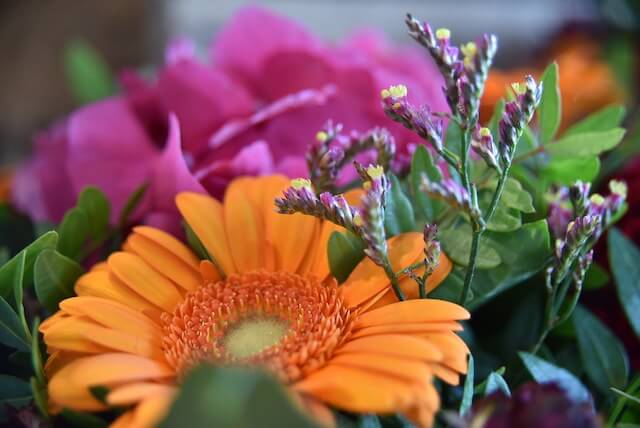
Flowers and tiny insects are common topics. It enables us to observe things up close that are ordinarily out of sight.
Using this kind of photography, you may highlight the details of inanimate items or jewelry.
It is a frequently utilized artistic style in practically all forms of photography.
You may find it in photographs of travel, people, events, and even action in digital and film eras.
The degree of magnification is what defines an actual close-up photograph. One-to-one magnification is optimal when an item is displayed onto the camera sensors at its original size of one inch.
The identical 1-inch item would occupy just a ½ inch of the camera sensor and be magnified by 1:2 when presented at 1⁄2 actual size.
Nevertheless, anything enlarged by 1:1 or more is considered an actual macro.
Origination
After F. Percy Smith started taking pictures of insects in the 1900s, macro photography appeared for the first time.
He made use of extension tubes and bellows, essentially the similar tools we have today.
These tools moved the lenss distance from the camera negative, resulting in a tighter focus point and additional opportunities for close-up photography.
SLR or Single-lens reflex film cameras were developed in the 1950s. It enables the photographers to use the broad field of view to see through the cameras actual lens.
It widened the market for close-up photography and made it simpler for newcomers to learn.
Due to the rise in popularity of macro photography brought on by SLR cameras, the first specifically designed close-up lens was created.
These days, an extensive range of digital cameras and other equipment like lenses are available to assist in developing macro photography.
A high-quality close-up lens is the most critical piece of gear you will need to have.
Macro Photography Terms
In macro photography, the most common terms are working distance and magnification. So what are they? Lets keep reading!
Working Distance
The working distance refers to the distance between the nearest subject and the forefront of your lenses.
If you prefer to photograph little objects, 6 inches is the ideal distance. The lowest working distance for camera lenses is at the magnification ratio of 1:1.
If these lenses have more extraordinary focal lengths, they may potentially cover a wider area.
Magnification
Macro photography necessitates knowing how large or tiny your subjects will appear on the camera sensor.
When you evaluate the size of your subjects as they appear to the camera sensor to their actual size, you obtain a value known as magnification.
The term life-size magnification is used to describe your subject when the ratio is 1:1. Additionally, half-life-size magnification, or 1:2 magnification, exists.
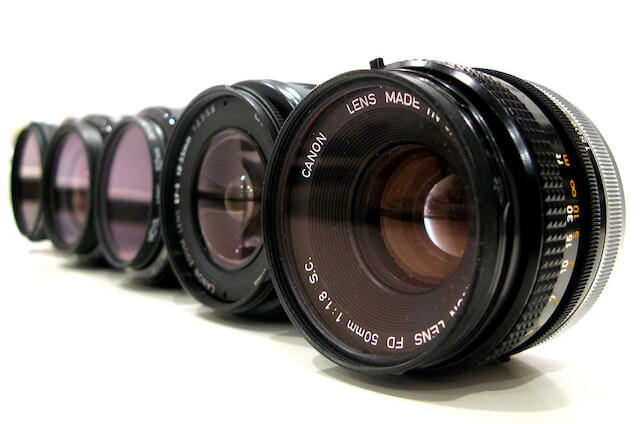
Macro Lenses
Macro lenses are a particular kind of camera lens that is made to focus closely on an object with a 1:1 reproduction.
Macro lenses are available in a wide range of focal lengths, ranging from 35mm to 200mm. Here are some common close-up lenses you should know.
Short lenses: 35 to 60mm
These lenses are lightweight and reasonably priced. Yet, they require that you be relatively near your subject, which may cause shadows or frighten your subject.
Intermediate lenses: 90 to 105mm
Although they offer a greater working distance, these mid-range lenses may still be lightweight enough to be used without a tripod.
Long lenses: 150 - to 200mm
Longer focal-length lenses take photographs with the most outstanding quality at a greater distance, making them perfect for timid close-up subjects, including insects.
They are, nevertheless, the most expensive and heavy macro lenses.
According to experts, a lens with a focal length from 100mm to 150mm is ideal for amateur photographers or beginners.
Subjects For Macro Photography
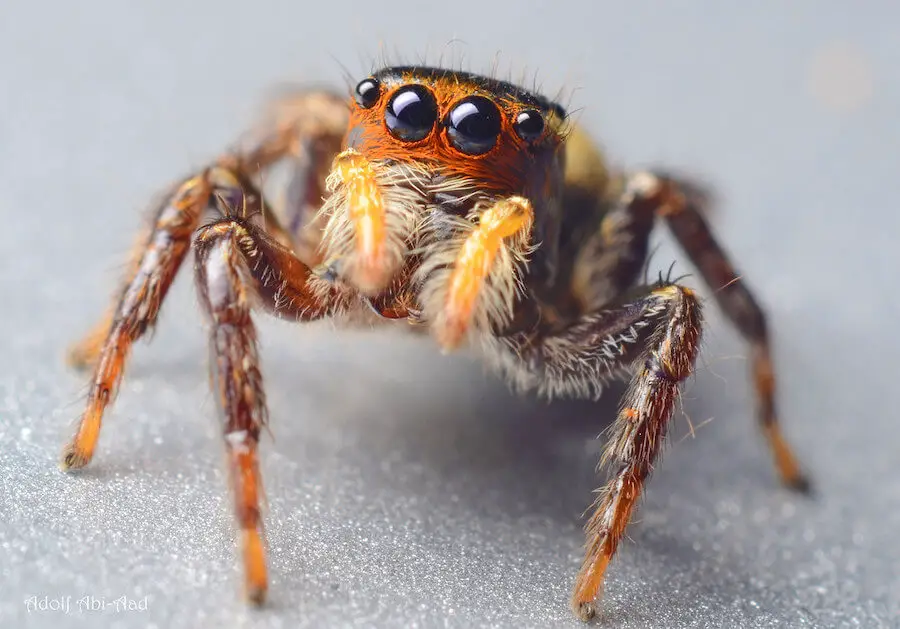
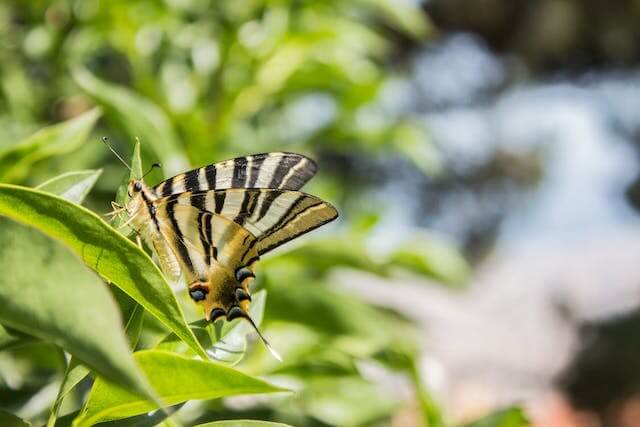
As shared earlier, macro photography aims to capture details of plants and insects that the human eyes cannot see.
Up to now, this photography style is a fantastic way to take closer shots of bees, flies, dragonflies, worms, butterflies, flowers, grasses, or leaves.
If you wonder about the subjects in this photography style, the list below includes the most popular ones you can see in a macro-photography picture.
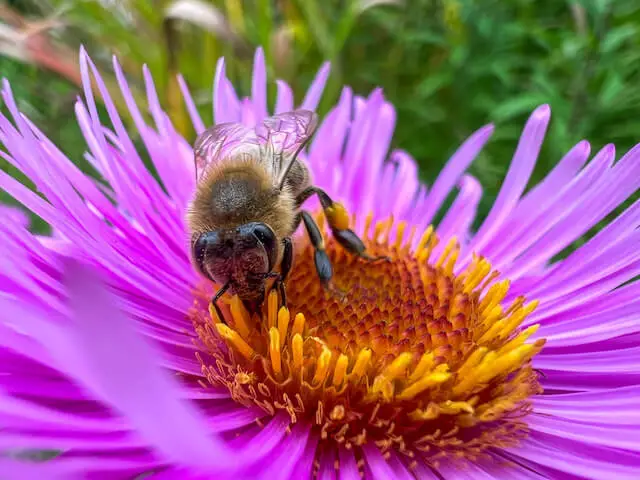
Nature
An excellent method to learn about these critters secret life is through close-up photography.
You may discover subjects to shoot at your neighborhood park or garden.
Try a location with water if youre unsure where you should go because many florae thrive there, and insects also enjoy the area.
Be cautious to protect yourself completely to avoid mosquito bites when taking any wildlife shooting.
You can wear long pants, a neck scarf, long sleeves, or even gloves if necessary.
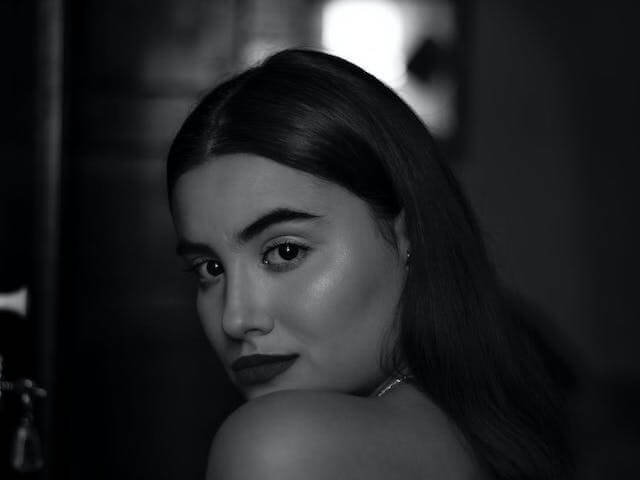
Portraits
In addition to insects and wildflowers, there are numerous additional things you may picture at a close distance.
One interesting technique to capture a persons appearance is using macro photography.
You can take close-up pictures of someones eyes, nose, or ears to capture human subtleties that other techniques might overlook.
However, its best to be sure that your person is at ease with having this area of their body inspected by your lens.
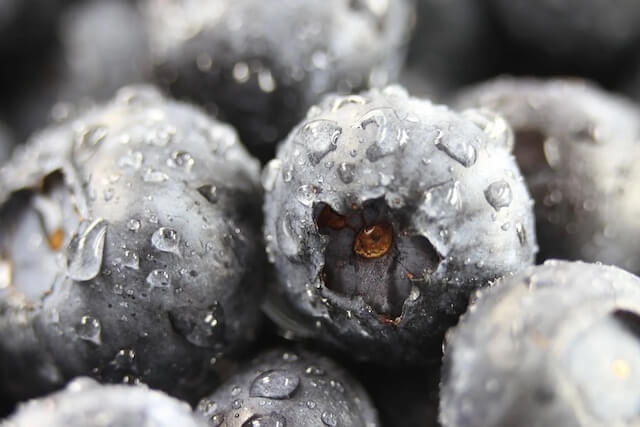
Food
Food photographers frequently employ close-up photography, whether photographing quick food eateries or upscale dining establishments.
Accentuating the hues, textures, and handiwork of the beverages and food is the objective.
Products
Photographers may also take detailed pictures of other goods using macro photography.
Practice taking pictures of the intricacies of various objects around your home if you intend to utilize this photography to support your photographing company.

Best Cameras For Macro Photography
Having various lens types means that the types of cameras for macro photography are also diverse.
For this reason, choosing the best one may depend on several elements. Below are some of the popular camera types to consider:
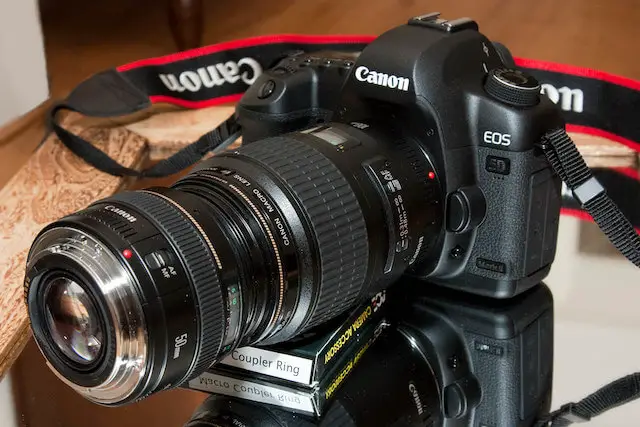
Mirrorless vs. DSLR
Both mirrorless cameras and DSLRs may provide excellent results when used in close-up photography.
Selecting cameras that enable the use of decent macro lenses is crucial.
The time between viewing your subject, pushing the shutter, and getting the image captured should be as short as possible on the camera.
In the past, DSLRs had an advantage in both of these categories. Mirrorless cameras have fewer built-in macro lenses and sluggish electronic viewfinders.
These days, the differences are usually insignificant and occasionally benefit mirrorless cameras.
Additionally, focus peaking is one of the advantages of a mirrorless camera that you can find beneficial.
Moreover, it is helpful to evaluate your images without shifting your gaze away from the camera viewfinder if you need to assess factors like clarity and light exposure rapidly.
However, you should remember that if you choose a mirrorless camera, be sure it has an electronic viewfinder.
Using a back LCD panel to frame and keep a stable macro shot is a headache, especially at high magnifications such as 1:1.
The costs of a mirrorless camera with an electronic viewfinder are usually higher than those of a comparable DSLR.
Therefore, if youre on a tight budget, you may want to buy a DSLR-possibly a secondhand one.
However, everything here is incredibly selective. It doesnt matter what equipment you have-you can still take some great pictures.
Besides, no camera promises a 100% keeper ratio for such challenging subjects.
Crop-Sensor vs. Full-Frame
A full-frame camera is typically inappropriate for this photography if your objective is to produce images with maximum magnification.
The 20-megapixel Nikon D7500s capability for close-up detail is more than that of the 46-megapixel Nikon D850 since the D7500s pixel density is slightly greater.
The most excellent pixel density you can use for macro photography will influence how much detail you will capture of your subject.
Although it features more maximum pixels than the D7500s crop sensor, the big sensor of the D850 has fewer pixels/millimeters.
Greater pixel size and a higher pixel count are more favorable in many types of photography.
However, regarding macro photography with 1:1, pixel density is everything.
Thats because cropping a D850 shot to match one taken with the D7500 results in a significant loss of pixels to favor the D7500.
However, close-up photography works well with a full-frame camera for many good reasons.
Nevertheless, photos taken at lower magnification have distinct advantages over small sensors.
Therefore, full-frame cameras often outperform crop-sensor ones if used in macro photography, but less so than in many other photographic genres.
Nikon vs. Canon
Nikon and Canon cameras are nearly identical in performance for virtually all types of photography, making comparisons between those that are superior at best entirely subjective.
There are distinctions, but its uncommon for any technology to have a fault that would be deadly to most users.
It still holds for macro photography, but several additional factors must be considered.
Compared to other camera manufacturers, Canon cameras dont compute aperture in a similar technique.
The Canon cameras will misinterpret the aperture value when photographing at extreme magnifications such as 1:1.
It may indicate f/11, yet the image may appear to have been taken at f/22 due to depth of focus, diffraction, and exposure.
Thats because, at these high magnifications, the aperture on most lenses starts to function unpredictably.
Unlike Nikon or other manufacturers, Canon doesnt offer a functionally correct aperture.
Therefore, while using Canon cameras, take this thing into account. Its crucial to be aware of this problem even though its not insurmountable.
Remember that it becomes a big problem as you switch magnifications more regularly.
How To Take A Good Macro Photograph?
Nowadays, most cameras include a macro setting that lets users take photos of objects at much closer ranges.
The cameras automatically change lens features and push them nearer to the camera sensor with close-up tubes or extra lenses to provide optimal close focusing.
Yet, its not true since you need a specialized macro lens to accomplish this task.
Otherwise, you can purchase a lens or attachment that will allow you to take macro photos with your device.
Additionally, you may make the subject look more enlarged by cropping a shot to simulate a close-up.
Nevertheless, most cameras digital output is smaller than their film counterparts.
For this reason, cropping doesnt produce ideal outcomes because resorting to such procedures typically leads to decreased image quality.
Various macro lenses are available for specific digital cameras that reach up to 10x for pro macro photographs to accomplish genuine close-up photography.
If you find taking close-up photos complicated, the following guides will make it easier! Lets take a closer look!
Invest In A High-Quality Macro Lens
Although you may find the macro setting on todays cameras in the analog settings or menu, it doesnt feature much of a life-sized magnification.
Youll have to invest in specialist zoom lenses for your device if you intend to take photos of macro subjects of gallery or magazine quality.
Several different close-up lenses available for the camera give life-sized magnification or higher.
Although their pricing may surprise you, they are unquestionably worthwhile for higher-quality macro photographs.
Reversing lenses and extension tubes are just a couple of the fantastic additions available to enthusiasts.
Reversed lenses with extension tubes provide more magnification than conventional camera lenses.
However, a specialized lens for the camera is the most practical and adaptable solution if youre a newbie to this photography style.
Many widely used macro lenses feature a life-sized magnification and a focal length of 90mm to 105mm.
Other lenses have shorter working distances and focal lengths. Therefore, when you shoot, they can require you to get closer to the subject.
Additionally, using a flat-field lens is the best idea to achieve edge-to-edge clarity when photographing flat items like stamps or coins.
Choose An Appropriate Subject
Contrary to common assumption, not all subjects make for interesting macro things. Some subjects become undetectable when seen close-up and in isolation.
How can your viewers enjoy your macro photo if they dont know what they are looking at? However, its all a matter of taste and aesthetics.
When a subject you shot seems perplexing in close-up photography, but its still visually appealing, it is unquestionably an appropriate subject.
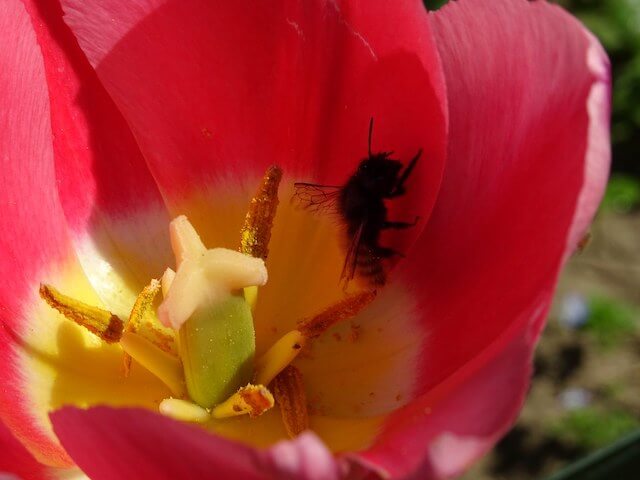
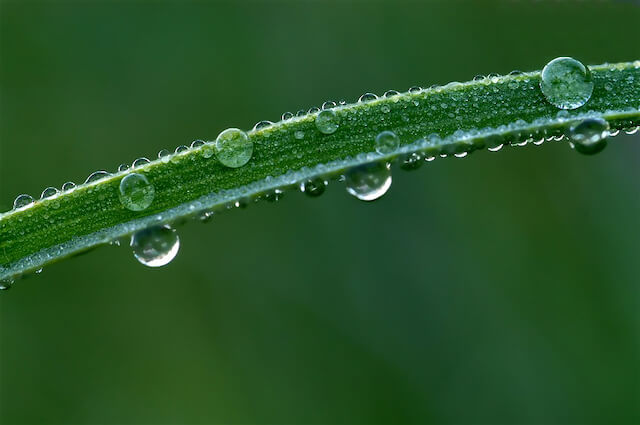
Small objects, including miniature dolls, household goods, jewelry, tiny insects, raindrops, and butterflies, are popular subjects.
Inanimate items are straightforward to photograph because they do not move. However, insects and other bugs may be pretty tricky.
One important photography tip is to keep your distance when taking pictures of them to prevent frightening them away.
Select The Best Weather And Location
In addition to plants and flowers, little insects and bugs are some of the fascinating subjects for close-up lens photography.
You will have numerous opportunities to take macro photos in areas with many plants and flowers.
In terms of insects and bugs, they will become more active when the weather is warm outside.
You need to shoot them outside when its at least 62 degrees Fahrenheit.
Since insects remain stationary in their surroundings during colder months, its also an excellent time to capture them.
During the summertime, a select group of macro aficionados makes early morning trips to specific locations to observe and photograph sleeping insects.
In addition to providing softer lighting, cloudy days are significantly better for taking close-up photos than sunny ones.
Furthermore, its better to learn about the behaviors of bugs. Some bugs may fly away as you approach them, quickly adjust to your sight, or ignore you.
To better understand insect behavior, take lots of macro photos. If you do, it will be simple for you to predict the subjects following action.
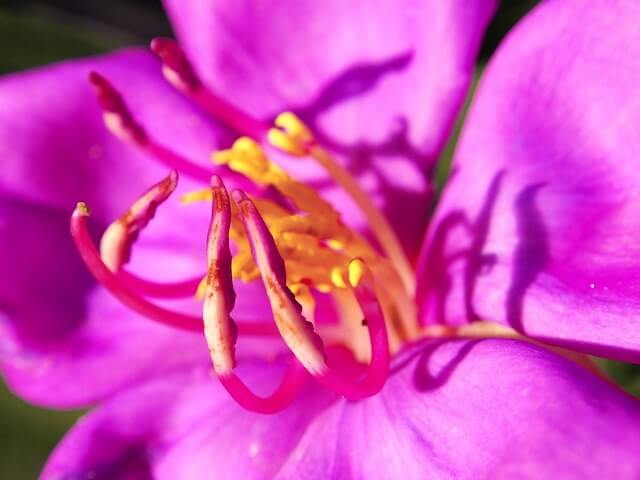
Bright sunlight may be challenging to overcome when photographing very delicate items like leaves or flowers.
It may overexpose some areas of your shot or burn through the subject, creating hot patches.
Therefore, its a great idea to use a shade or create it if necessary when shooting on cloudy days.
Invest In A Stable Tripod
Simply by not moving your camera, you may manage the compositions and take away the moving cameras variable.
Its wise to purchase a tripod. You can put your camera on this tripod so it wont move around.
When photographing up near and personal, you must be careful to keep your camera stable, even if you use a tripod.
Small, unintentional changes in framing may completely change a photograph.
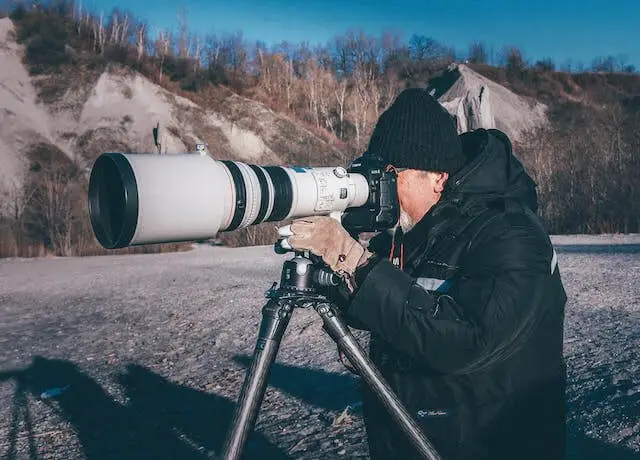
Choose A Long Focal Length To Take Photos Of Living Things
Depending on your subject, you might need to use lenses with a greater focal length.
Shooting insects and items up close enable you to virtually go in closer without upsetting them or destroying their natural surroundings.
A focal length greater than 90mm is the ideal choice for these kinds of circumstances.
Use Assistive Accessories
With the help of aids that you may include in your close-up photography kit, you can take good macro pictures even without a specialist close-up lens.
A diopter, commonly referred to as the poor guys macro lens is what they name it.
It essentially functions as a magnifying glass or close-up filter that is fitted onto your ordinary lens, a bridge, or tiny camera.
This technique allows you to obtain macro magnification without buying a dedicated close-up lens.
The inflatable, accordion-like component of cameras called tubes or bellows aids in getting close-up shots of the subject.
Lens adapters also let you manually adjust the aperture and flip your lens.
You may utilize third-party equipment in place of a tripod to hold and support the subject stably and in front of the background of your choice.
Customize The Background
Since you can completely control the lighting, location, and background, photographing inanimate things is not difficult.
Depending on your composition, just put your subjects in front of the background you want, being careful not to let them clash.
Several photographers like to keep things simple by placing their subjects before a landscape that contrasts with them, but its further distant from their subject, making it appear as a lovely backdrop blur.
If youre filming outside on the spot, you might not have much management over the background.
However, you can alter your viewpoint or even employ the assistance of a 3rd party to arrange the subject so that it faces you from a different angle.
Remember that the brightest area in a photograph attracts the eye first. Hence, be mindful of the background while photographing in mixed lighting.
Change your vantage point, go closer, or cover the frame using the subject, if necessary.
Otherwise, bring a piece of blank paper or sheet or an eight by ten generic greenery print without any highlights to place behind the subject.
By using a larger aperture, you may decrease the level of background clutter.
It lessens backdrop emphasis or employs a circle light, which drowns out most backgrounds.
Work On The Depth Of Field
Youll typically hear recommendations to utilize smaller apertures.
They widen the field depth while also ensuring that your subjects crucial elements are clearly in focus.
The issue with choosing a narrower aperture is the amount of light that is lowered and diffracted can significantly alter how sharp your image is.
By contrast, if you choose an aperture that is too big, it will reduce your depth of field, so you risk having some of the subjects details blurry.
Getting the appropriate depth of focus into the proper proportions and sharpness while taking macro photos is among the most challenging aspects of the process.
Can you compose your shot from an angle or viewpoint that focuses on only one plane of your subjects attractiveness or most significant features?
If yes, finding the biggest aperture that can let you achieve that without causing any areas of the subject to be blurry is all that is essential.
Below are some solutions you can consider:
Crop the image
Its also possible to use a narrower aperture and a lower magnification if you find cropping your photo is not a big issue.
The idea is to make sure the subject is sharp overall, and then you can crop the image to make it look bigger.
However, employing lower apertures has the drawback of preventing more illumination from entering the lens.
It denotes that youll frequently require a slower shutter speed so you can reveal your photo adequately.
Depending on your preference, you can use a tripod to create a stable picture and a flash to light the scene, which can solve the problem.
Apply focus stacking
Focus stacking is another suggestion for resolving the issue of striking a balance between sharpness and depth of field. It is among the built-in features of modern cameras.
If your camera doesnt include this functionality, you can consider Photoshop to complete the task.
Opt For Manual Override
The manual overrides will give you better results while focusing on macro photography.
Thats because the lens can latch onto a clean region, where the focusing mechanism performs best.
However, it isnt always the case when using macro lenses to take close-up photos. Your lens may go crazy searching for anything to focus on.
By using manual focus, you may choose what you need to concentrate on and lock onto it once you are content with what your lens shows.
Pay more attention when the subject of your attention is in the middle of your photograph.
You should be aware that anything towards the frames edges will often be blurred when you have a shallow depth of field.
Recompose your image or concentrate on anything in the brighter region to build your composition if you notice a brilliant section along the bottom border.

Set A Good Lighting
Light is always a crucial aspect of photography. Macro photographers undoubtedly gain a lot from having favorable lighting circumstances.
You may add lighting to complement your exposure adjustments and utilize it to enhance your photographs creatively.
Many experienced photographers suggest a ring flash will be better for beginners.
Photographing moving things and using a handheld camera allows you to utilize narrower apertures and faster shutter rates.
Determine The Point Of Focus
Simply focus on the subject and press the shutter when youve got your photo ready.
However, its helpful to be aware that the focus point may significantly enhance the overall composition in this photography style before you make a decision.
Learning to focus on various areas of the image manually is one way to capture better close-up shots.
Change The Angle
Beginners in macro photography often stand 45 degrees away from the subjects and shoot them from that posture.
Finding unusual viewpoints is essential because your images will seem monotonous if you keep making the same error.
Try photographing your object from above, below, or even the side.
Add More Elements
You may capture amazing macro images by shooting raindrops from your window or frost drops on plants. Yet, its not necessary to wait for dew or rain.
If you want to add extra visual appeal to your photograph, you may use a spray bottle to sprinkle drips on the subject lightly.
Edit The Photos
You shouldnt assume that you can take pictures carelessly just because you can edit your images in Adobe Photoshop afterward.
Using editing, you may shape and adjust your photo to produce the desired aesthetic result.
Crop the image
Cropping is relatively practical, particularly for macro photography. Sometimes its impossible to approach any subject as closely as you want.
Simply choose the portion of the picture that piques your attention and enlarge it to take up the entire frame.
Adjust colors
Use your softwares white balance or color balance controls to replicate the hue you observed if you discover that the tint is not precisely accurate.
Both utilize sliders, allowing you to experiment with the settings until youre content with the color modifications.
Alter exposure
you can save otherwise fine photos which require an exposure correction.
For instance, you may replicate fill lighting by utilizing the fill slider if the subjects are dark or even less colorful than you want.
Otherwise, you may use the recovery or exposure sliders to tame an excessively bright photograph.
Fine-tune contrast
Use the black slider or the contrast slider if necessary to bring contrast to get the desired effect.
Play around with the black adjuster to find a degree of contrast effect that will make your subject stand out from the backdrop.
Sharpen the image
Even when you take all the necessary precautions to capture clear, in-focus photos when you take, you will usually have to sharpen the shots as a phase of the post process.
Thats because pixels in digital photographs are constructed in a way that makes them look blurry during exposure.
The Bottom Line
A lifetime passion for macro photography is possible for a novice photographer. Its a fascinating field. Since there are fascinating subjects all around, appealing image creatives are not limited.
Photography demands a lot of experience and a good dose of imagination, whether you are just getting started or want to become a professional.
Hopefully, you will be successful in your career path with our helpful guidelines. If you have further questions, please comment below.
Thanks for taking the time to follow this post!