Are you looking to take your video conferencing to the next level? With the right tools and know-how, you can use your DSLR as a webcam for your Mac.
In this step-by-step guide, well show you exactly how to do it, from setting up the camera to downloading and installing the necessary software and connecting it to your Mac.
Youll also learn some helpful tips for getting the best quality out of your camera.
So, if youre ready to take your video calls to the next level, lets get started!.
Table of Contents
Short Answer
To use a DSLR as a webcam on a Mac, youll need to install a third-party capture software such as Cam Link 4K.
After installing the software, connect your DSLR to your Mac via USB and open the capture software.
From there, you can configure the video source, audio source, and other settings before broadcasting the video feed.
Youll also need to make sure the necessary drivers are installed and that the video and audio settings are configured correctly in the capture software.
What You Will Need
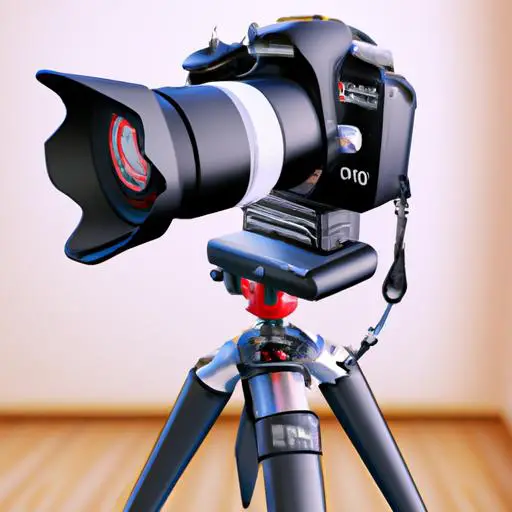
To use your DSLR as a webcam on your Mac, you will need the appropriate software, a USB cable, and a DSLR camera that supports tethered shooting.
The software you need will depend on the specific camera you have.
Most DSLR cameras come with a dedicated software package for tethered shooting, but if your camera does not have one, you can use third-party software such as CamRanger or ControlMyNikon.
You will also need a USB cable that is compatible with your DSLR camera.
Many DSLR cameras come with a USB cable, but if yours does not, you can purchase one from any photography store or online retailer.
Finally, you need to make sure that your DSLR camera supports tethered shooting.
Most DSLR cameras do support this feature, but not all of them.
If your camera does not support tethered shooting, then you will not be able to use it as a webcam on your Mac.
Setting Up the Camera

For Mac users, setting up a DSLR camera to act as a webcam is a relatively straightforward process.
To get started, youll need the right software and a USB cable to connect the camera to your Mac.
If your DSLR supports tethered shooting, youll also need to install the appropriate software so that you can transfer images and videos from the camera to your Mac.
Once your software and cable are in place, you can begin setting up the camera.
Start by connecting the USB cable to the camera and to your Mac.
Then, turn the camera on and set it to the appropriate mode for tethered shooting.
Depending on your camera, you may need to select a Live View option or enable USB Mode before you can begin capturing video.
Once you have your camera set up, you can configure the software on your Mac.
Some software may require you to select the camera from a list of available devices or manually enter the cameras serial number.
Once the software is configured, you can begin capturing video and audio from the camera.
With the right setup, you can easily capture high quality video and audio from your DSLR and use it as a webcam on your Mac.
With the right software and a USB cable, you can turn your DSLR into a high quality webcam in no time.
Downloading and Installing Necessary Software
Using a DSLR camera as a webcam on your Mac is easier than you might think.
To get started, youll need to download and install the appropriate software and connect your DSLR camera to your Mac with a USB cable.
First, youll need to find a compatible software that supports tethered shooting.
Popular options include EOS Webcam Utility (for Canon cameras) and Cam Link (for Nikon cameras).
Once youve chosen a suitable software, download and install it on your Mac.
Once the installation is complete, connect your DSLR camera to your Mac with a USB cable.
You may need to refer to your cameras manual for instructions on how to connect it.
Once your camera is connected, youre ready to start using your DSLR as a webcam on your Mac.
Preparing the Camera for Use

When preparing your DSLR camera to use as a webcam on a Mac computer, there are a few basic steps that should be taken.
First, you will need to make sure that you have the appropriate software installed on your Mac computer.
This software may vary from camera to camera, so be sure to check the manufacturers website for the correct software for your specific model.
Once the software is installed, you will need to connect your DSLR camera to your Mac via a USB cable.
This will allow your computer to recognize the camera as a webcam, and you can then use the software to control the camera and adjust the settings.
Next, you will need to make sure that your camera is set up properly for use as a webcam.
This involves making sure that the lens is properly focused and the cameras white balance is set correctly.
Additionally, you should make sure that the camera is set to record in the highest quality setting possible.
This will ensure that the video you record is of the highest quality.
Finally, you should adjust the cameras view so that it is pointing at the area you would like to record.
Once your camera is set up and connected to your Mac, you can begin using it as a webcam.
The specific steps and features may vary from camera to camera, but most will allow you to adjust the video settings and record video directly to your computer.
Additionally, you may be able to use the software to stream live video or upload recorded videos to the internet.
With the right setup, you can easily capture high quality video and audio from your DSLR and use it as a webcam on your Mac.
Connecting the Camera to Your Mac
Connecting a DSLR camera to your Mac is relatively easy, but the exact process will depend on the model of DSLR youre using.
Generally, youll need to plug the camera into your Mac via a USB cable.
You may also need to install a driver or software specifically for your camera model, as some cameras require software to facilitate the connection.
Once your Mac recognizes the camera, youre ready to start using it as a webcam.
The next step is to configure your camera for tethered shooting.
This involves setting up the camera so that it sends the video and audio feed directly to your Mac.
Depending on your camera, this may require you to install a specific software or driver.
Once youve set up your camera for tethered shooting, youll be able to use it as a webcam on your Mac.
Finally, youll need to install the appropriate software for capturing the video and audio from your DSLR.
There are a few different software packages available for this purpose, so youll need to do some research to find the one that best fits your needs.
Once youve installed the software, youll be able to use your DSLR as a webcam on your Mac.
Using a DSLR as a webcam on a Mac is a great way to get professional quality video and audio for streaming, video conferencing, and more.
With the right setup, youll be able to easily capture high quality video and audio from your DSLR and use it as a webcam on your Mac.
Using the Camera with Your Mac

Using a DSLR camera as a webcam on a Mac is a great way to get professional quality video and audio for streaming, video conferencing, and more.
To get started, youll need to make sure you have the appropriate software and hardware.
Youll need a USB cable to connect your DSLR to your Mac, and youll also need a DSLR camera that supports tethered shooting.
With the right setup, youll be able to capture high quality video and audio from your DSLR and use it as a webcam on your Mac.
First, youll need to download the appropriate software to use with your camera.
This software will allow you to control the cameras settings, such as shutter speed and aperture, as well as transferring photos and videos to your Mac.
Popular software includes Adobe Lightroom or Capture One Pro.
Once youve downloaded the software, youll also need to download and install the appropriate drivers for your camera, which can usually be found on the camera manufacturers website.
Once youve got the software and drivers installed, youll need to connect your camera to your Mac.
To do this, youll need a USB cable that is compatible with your camera.
You can usually find this in the box your camera came in, or you can buy one online.
Once your camera is connected, youll need to open the software you downloaded and follow the instructions to get your camera set up.
Once your camera is connected and set up, youll be able to use it as a webcam.
Youll need to make sure that the software youre using is set to use the camera as a webcam, and then youll be able to start streaming or video conferencing.
Youll be able to adjust the cameras settings to get the best quality video and audio, and you can even use the camera to take still photos if you want.
Using a DSLR as a webcam on a Mac is a great way to get professional quality video and audio for streaming, video conferencing, and more.
With the right setup and software, youll be able to capture high quality video and audio from your DSLR and use it as a webcam on your Mac.
Just make sure you have the right software, drivers, and USB cable, and youll be set to go.
Tips for Getting the Best Quality
When it comes to using a DSLR as a webcam on a Mac, quality is key.
To get the best quality video and audio from your DSLR, there are a few tips and tricks you can use.
First, make sure you have the right software.
Youll need a program that supports tethered shooting and allows you to control settings like aperture, shutter speed, and ISO.
This will ensure that you get the best quality video and audio possible.
Second, use a high-quality USB cable.
The cable should be rated for high-speed data transfer, as this will ensure that your video and audio are clear and sharp.
Third, make sure your DSLR camera is set up correctly.
Adjust your settings to match the environment youre shooting in, and use the manual focus feature to get the best results.
Finally, experiment with different lighting setups.
Experiment with different angles and distances to get the best possible results.
Lighting can make a big difference in the quality of your video, so take the time to find the best lighting setup for your needs.
Following these tips will help you get the best quality from your DSLR when using it as a webcam on your Mac.
With the right setup and the right software, youll be able to capture professional quality video and audio for all your streaming and video conferencing needs.
Final Thoughts
Using a DSLR as a webcam on your Mac is a great way to get professional quality video and audio for streaming, video conferencing, and more.
With the right setup, you can easily capture high quality video and audio from your DSLR and use it as a webcam on your Mac.
Now that you know how to set up and use your DSLR as a webcam, give it a try and see if it works for you!.