Are you looking to take your mobile photography to the next level? Would you like to take stunning DSLR-like photos from your iPhone? If so, youre in the right place! In this article, well cover 7 essential tips to help you take beautiful photos with your iPhone.
From choosing the right apps to adjusting camera settings and white balance, to working with shutter speed and the rule of thirds, and editing in post-production, youll be equipped with the knowledge to take amazing photos with your iPhone.
Ready to get started? Lets dive in!.
Table of Contents
Short Answer
Taking DSLR-like photos from an iPhone requires making sure you have good lighting, a steady hand, and the right editing tools.
To ensure good lighting, try to take photos in natural light or use a ring light for a more professional look.
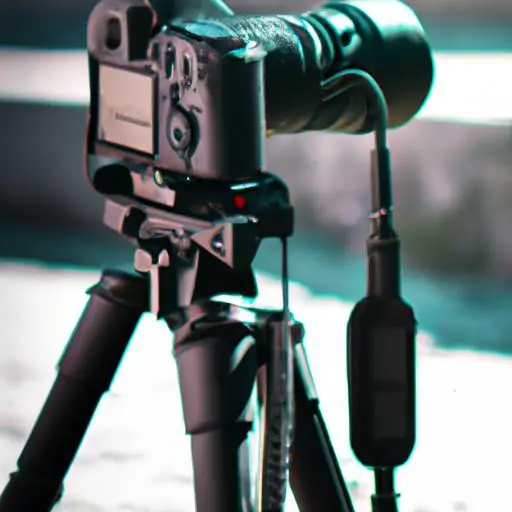
To help steady your hand, you can use a tripod or lean against a wall.
Finally, use photo editing apps like VSCO or Adobe Lightroom to adjust exposure, contrast, and saturation to give your photos a polished look.
Choosing the Right App
When it comes to taking DSLR-like photos from your iPhone, the right app can make all the difference.
There are a variety of apps available on the App Store that offer manual camera settings and control features, so its important to take the time to find one that suits your needs.
Look for an app with a user-friendly interface, as this will make it easier to adjust the settings to get the look you want.
Additionally, its helpful to find an app that allows you to save your settings, so you dont have to go through the process of adjusting them every time you want to take a picture.
Some of the most popular apps for taking DSLR-style photos from your iPhone include ProCamera, Camera+, and Halide.
All of these apps have a wide range of options and settings, so youll be able to find one that suits your needs.
Once you have the app installed, you can start experimenting with the settings to take beautiful DSLR-like photos.
Adjusting Camera Settings

Taking DSLR-style photos from an iPhone is easier than you might think.
To get started, youll need to find an app with manual camera settings and control features.
Once you have the app installed, you can use the right settings to adjust shutter speed, white balance, exposure, and other elements to get the desired look.
When adjusting camera settings, its important to remember that shutter speed, white balance, and exposure all play a role in the final result of your photo.
Shutter speed can be used to determine the amount of time the cameras sensor is exposed to the light.
Increasing the shutter speed will result in a brighter image, while decreasing the shutter speed will result in a darker image.
White balance adjusts the colors in an image, allowing you to make a photo appear warmer or cooler.
Finally, exposure adjusts the overall brightness of an image.
To adjust these settings, youll need to find an app with manual camera settings.
There are a few different options, but one of the most popular is the ProCamera app.
With this app, you can adjust shutter speed, white balance, exposure, and other elements with a few taps of the screen.
Once youve adjusted the settings to your liking, you can take the photo and check the results.
If the image doesnt look quite right, you can go back and adjust the settings until you get the desired result.
With a bit of practice and some tweaking of the settings, you can take stunning DSLR-like photos with your iPhone.
Working with White Balance
When taking DSLR-like photos, white balance can make a huge difference in the overall look and feel of the image.
White balance is the process of adjusting the colors of your photo to match the colors of the light source.
When taking photos on your iPhone, you can adjust the white balance manually with the help of apps.
This allows you to get the colors in your photos to look more natural and realistic.
When adjusting white balance, it is important to consider the type of light source you are shooting in.
Different light sources will produce different colors, so it is important to adjust the white balance accordingly.
When shooting indoors, you should adjust the white balance to match the type of light you are using.
For example, if you are shooting with fluorescent lights, you should adjust the white balance to the fluorescent setting.
Similarly, if you are shooting with natural light, you should adjust the white balance to the daylight setting.
If you are shooting in mixed light, you may need to adjust the white balance to a custom setting.
In addition to adjusting the white balance for the type of light source you are using, you should also consider the color temperature of the light.
Color temperature is measured in Kelvin (K) and is a measure of the warmth or coolness of the light.
Warmer light has a lower Kelvin rating and cooler light has a higher Kelvin rating.
To get the most accurate colors in your photos, you should adjust the white balance to match the color temperature of the light you are shooting in.
Finally, it is important to remember that white balance is an important tool for getting the most accurate colors in your photos.
When shooting with your iPhone, make sure to adjust the white balance according to the type of light you are using and the color temperature.
This will help you get the most DSLR-like results from your photos.
Adjusting Shutter Speed

When it comes to taking DSLR-like photos from your iPhone, adjusting shutter speed is essential.
Shutter speed is the amount of time that your camera shutter is open.
The longer the shutter is open, the more light enters the camera and the brighter the image will appear.
This is especially important when shooting in low light conditions.
A slow shutter speed will also allow for more motion blur, which can add a dynamic look to your images.
To adjust the shutter speed on your iPhone, youll need to find an app that has manual camera settings.
Once the app is installed, youll be able to adjust the shutter speed to get the desired effect.
When setting your shutter speed, its important to remember that the higher the shutter speed, the sharper the image will appear.
Conversely, the lower the shutter speed, the more motion blur will be present.
Its also important to keep in mind that shutter speed also affects the exposure of your photos.
If youre shooting in low light, its best to use a slower shutter speed to allow more light into the camera.
On the other hand, if youre shooting in bright light, youll want to use a faster shutter speed to reduce the amount of light entering the camera.
By adjusting the shutter speed of your iPhone, you can achieve a variety of looks, from crisp, clear images to a more dynamic, motion-filled shot.
With a bit of practice and experimentation, youll be able to get the perfect DSLR-like image from your iPhone.
Using the Rule of Thirds
The rule of thirds is a widely used composition technique for creating balanced and aesthetically pleasing images.
This technique involves dividing your image into a three-by-three grid and placing the main elements of your photo along the lines and intersections of the grid.
Doing this creates a sense of movement and visual interest that draws the viewers eye to the important parts of the image.
Additionally, the rule of thirds can help you create a sense of depth and perspective in your photos.
When using the rule of thirds, you should pay attention to the placement of the horizon line in your photos.
Placing the horizon line in the upper or lower third of the grid creates balance, while placing the horizon line in the center can make the image appear static.
Additionally, you should pay attention to the placement of the other elements in your image.
If youre taking a portrait, you should position the subjects eyes along one of the lines of the grid.
If youre taking a landscape, you should place the main elements of the photo along the lines of the grid.
The rule of thirds is a great way to add interest to your photos and create a sense of balance and movement.
With a bit of practice, you can use this technique to take stunning DSLR-like photos with your iPhone.
Editing in Post-Production

Post-production editing is a great way to take your DSLR-like photos from your iPhone to the next level.
With the right apps and techniques, you can enhance the quality and appearance of your photos after theyve been taken.
By adjusting exposure, color balance, cropping, and sharpening, you can create a unique and professional look that will be sure to impress.
One of the most popular post-production editing apps is Adobe Lightroom CC.
With Lightroom, you can adjust the exposure, contrast, shadows, and highlights of your photos to create a more dynamic look.
You can also use the app to crop and rotate your photos, as well as make small tweaks to the color balance and tint.
Additionally, you can sharpen the details in your photos and add a variety of filters to give them a unique and stylized look.
Another popular post-production editing app is VSCO.
This app is great for creating a more artistic and cinematic look for your photos.
With VSCO, you can adjust the exposure, contrast, warmth, and saturation of your photos to give them a more vibrant and dynamic look.
Additionally, you can add a variety of filters to give your photos a unique and artistic touch.
Finally, post-production editing apps such as Snapseed and Pixelmator Pro are great for making small adjustments and enhancements to your photos.
With these apps, you can make small tweaks to the color balance, exposure, and sharpness of your photos to give them a more polished and professional look.
By leveraging the right apps and techniques, you can take your DSLR-like photos from your iPhone to the next level.
With a bit of practice and experimentation, you can create stunning photos that look like they were taken with an expensive camera.
Practicing to Perfect Your Photos
Once you have the right apps and settings in place, the next step is to practice to perfect your photos.
Taking DSLR-style photos with an iPhone requires a lot of patience and practice.
You need to get familiar with the app and its features to be able to get the best results.
To begin, try shooting in different environments and settings.
Experiment with different angles and perspectives to create interesting compositions.
Taking advantage of the rule of thirds can help you create more balanced and aesthetically pleasing photos.
Additionally, if youre using an app with manual settings, practice adjusting the shutter speed, white balance, exposure, and other elements to get the desired look.
You can also practice shooting in different lighting conditions.
Different lighting conditions can have a dramatic effect on the results so its important to experiment.
Try shooting during different times of the day, indoors and outdoors, and in different weather conditions.
Practice shooting in different environments and settings to get familiar with the different effects that different lighting conditions can have on your photos.
Finally, editing can help you take your photos to the next level.
Even the best photos can benefit from a bit of post-production work.
There are a lot of great photo editing apps available that can help you make adjustments to your photos such as color correction, saturation, and sharpening.
With a bit of practice and experimentation, you can take stunning DSLR-like photos with your iPhone.
Final Thoughts
By following the steps outlined in this article, you can take DSLR-like photos from your iPhone with ease.
With the right apps and settings, you can adjust elements such as white balance, shutter speed, and exposure to get the desired look.
Additionally, using the rule of thirds and editing in post-production can help to improve the quality of your photos.
With a bit of practice, you can take beautiful, professional-looking photos with your iPhone.
So go ahead and start experimenting with different settings and techniques to take stunning DSLR-like photos from your iPhone today!.