Have you ever wanted to take stunning photographs of the night sky with a telescope and a DSLR camera? If you have, then you have come to the right place! In this comprehensive guide, we will walk you through the process of how to use a DSLR camera with a telescope, from understanding what a DSLR camera is and preparing the telescope and DSLR for use, to adjusting the telescopes settings and taking photographs, to editing and post-processing the images.
Well also discuss the benefits of using a DSLR camera with a telescope so you can get the most out of your experience.
So lets get started!.
Table of Contents
Short Answer
Using a DSLR with a telescope can be a great way to capture images of the night sky.
First, youll need to attach the DSLR to the telescope using a T-ring adapter.
Then, youll need to adjust the focus of the telescope to get a clear image.
Finally, youll need to use the DSLRs manual settings to get the best image quality possible.
With a bit of practice and patience, you should be able to capture amazing images with your DSLR and telescope.
What Is a DSLR Camera?
A DSLR camera (Digital Single Lens Reflex) is a type of digital camera that uses a single lens to take photos and videos.
It is the preferred choice for professional photographers due to its versatility and high image quality.
A DSLR camera has a viewfinder, interchangeable lenses, a large image sensor, and the ability to shoot in a variety of settings.
The image sensor captures the light coming through the lens and creates a digital image that can be viewed on a display or stored on a memory card.
DSLR cameras also offer a wide range of features, such as manual exposure control, long exposure capabilities, and the ability to shoot in RAW format.
With a DSLR camera, you can take high-quality photos and videos that can be shared with friends and family.
Preparing the Telescope and DSLR for Use

Using a DSLR with a telescope can be an incredibly rewarding experience, allowing you to capture stunning images of the night sky that you can share with friends and family.
However, before you can begin taking pictures, youll need to make sure that the telescope and camera are correctly set up and connected.
The first step is to attach the camera to the telescope, making sure that the cameras lens is securely connected to the telescopes eyepiece.
This is usually done using an adapter, which is available at most camera stores.
Once the adapter is in place, the camera should be securely attached to the telescope.
The next step is to adjust the telescopes settings to ensure that the image is in focus.
This can be done by adjusting the telescopes focuser, which is usually located on the side of the telescope.
You should also make sure that the telescope is pointed in the correct direction and is correctly aligned with the stars.
Finally, youll need to adjust the settings on the camera.
This can include setting the ISO, shutter speed, aperture, and white balance.
Once these settings are adjusted, you can begin taking photographs of distant objects in the night sky.
With the correct setup, youll be able to capture stunning images of the night sky with your DSLR and telescope.
With a little practice and patience, youll be able to take incredible photographs of distant galaxies, nebulae, and star clusters.
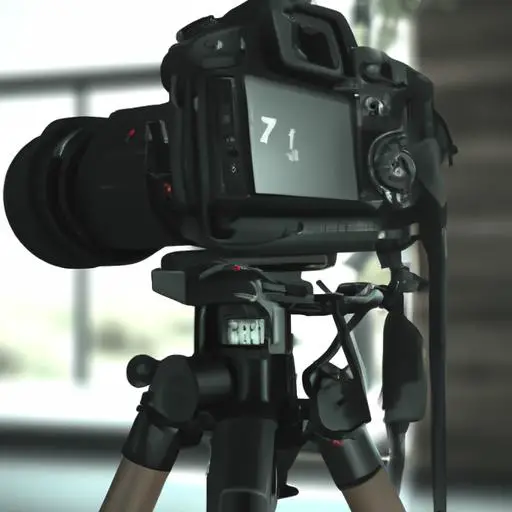
Attaching the DSLR Camera to the Telescope
Attaching a DSLR camera to a telescope is an essential part of capturing high-quality images of distant objects in the night sky.
To do this, youll need to make sure that the cameras lens is firmly connected to the telescopes eyepiece.
This can be done in a few simple steps.
First, youll need to attach the cameras lens to the eyepiece of the telescope.
To do this, youll need an adapter that is made for the type of camera you are using, as well as the type of telescope you are using.
Depending on the model of your camera and telescope, the adapter may need to be purchased separately.
Once the adapter is in place, youll need to attach the cameras lens to the eyepiece.
This is done by screwing the adapter into the eyepiece.
Make sure that the lens is securely attached and that the connection is tight.
Once the lens is in place, youll need to adjust the telescopes settings to ensure that the image is in focus.
This is done by adjusting the focus knob on the telescope until the image is clear.
You may also need to adjust the telescopes orientation and position to ensure that you are pointing it at the desired object in the night sky.
By following these steps, you can attach your DSLR camera to your telescope and begin capturing stunning images of the night sky.
With a DSLR and a telescope, you can capture amazing photographs of distant objects in the night sky that you can share with friends and family.
Adjusting the Telescopes Settings

Adjusting the telescopes settings is an important step when using a DSLR camera with a telescope.
To ensure that the image is in focus, the telescope must be adjusted correctly.
The first step is to align the telescope with the object you are trying to view in the night sky.
This requires adjusting the telescopes mount so that it is pointing towards the object.
Once the telescope is properly aligned, the telescopes focuser should be adjusted to bring the object into focus.
This requires careful adjustment of the focuser knob to ensure that the image is sharp and in focus.
Additionally, the telescopes eyepiece should be adjusted so that the cameras lens can be securely attached to it.
Once all of the adjustments are made, the image should be in focus and ready to be captured with the camera.
Taking Photographs with the DSLR and Telescope
Using a DSLR (Digital Single Lens Reflex) camera with a telescope is an excellent way to capture high-quality images of distant objects in the night sky.
To do this, youll need to attach the camera to the telescope, making sure that the cameras lens is securely connected to the telescopes eyepiece.
Once the camera is attached, youll need to adjust the telescopes settings to ensure that the image is in focus.
When taking photographs with a DSLR and telescope, it is important to make sure that the camera is properly mounted on the telescope.
You can do this by using a T-ring adapter, which is a type of adapter specifically designed for connecting digital cameras to telescopes.
This will ensure that the camera is securely attached to the telescope and that the image is properly aligned.
Once the camera is properly mounted, youll need to adjust the telescopes settings to get the image in focus.
This typically involves adjusting the focus knob and the aperture to get the image in focus.
You can also use the telescopes tracking system to keep the image in focus as the telescope moves.
Finally, you can start taking photographs of distant objects in the night sky! With a DSLR and a telescope, you can capture stunning images of the night sky that you can share with friends and family.
With some practice and patience, youll be able to capture some amazing images that you can be proud of.
Editing and Post-Processing the Images

Editing and post-processing the images youve captured with your DSLR and telescope is an important part of the process.
After all, you want to make sure that your images are sharp, clear and have the best possible color and contrast.
The first step in post-processing your images is to transfer them to your computer.
If youre using a DSLR, you can easily do this by connecting the camera to your computer via USB.
You can then download the images directly to your computer.
Once youve transferred the images, you can begin editing them.
You can use a variety of software programs to edit your images.
Adobe Photoshop is the industry standard for photo editing, and it has a range of features that make it ideal for post-processing images taken with a DSLR and telescope.
Other popular photo editing programs include Lightroom, GIMP, and Pixelmator.
When editing your images, you can adjust the color, contrast, and sharpness of the image to make it look its best.
You can also crop the image to remove any unwanted objects and make the composition more appealing.
Once youve finished editing your image, its time to save it.
You can save your image in a variety of file formats, such as JPEG or TIFF.
You can also choose to save it in the RAW format, which will allow you to make further edits to the image in the future.
By taking the time to edit and post-process your images taken with a DSLR and telescope, youll be able to create stunning images that youll be proud to share.
With the right tools and a bit of practice, youll be able to capture amazing images of the night sky that you can enjoy for years to come.
Benefits of Using a DSLR Camera with a Telescope
Using a Digital Single Lens Reflex (DSLR) Camera with a telescope can be a great way to capture beautiful, high-quality images of distant objects in the night sky.
With the right DSLR and telescope combination, youll be able to take night sky photographs that are more detailed and vibrant than ever before.
In addition to the improved quality of your images, there are several other benefits to using a DSLR with a telescope.
First, DSLR cameras offer a much wider field of view than traditional digital cameras.
This means that you can capture a larger area of the night sky in one photograph, allowing you to capture more of the night sky in one shot.
This can be especially useful when photographing galaxies and nebulae, as you can capture a larger area at once.
In addition to a wider field of view, DSLR cameras also offer better low-light performance.
This is especially important when photographing faint objects in the night sky, as these objects can easily be washed out by the light of the moon or artificial light sources.
With a DSLR camera, you can capture these faint objects with much more clarity and detail than you would be able to achieve with a traditional digital camera.
Finally, DSLR cameras allow you to adjust the settings of the camera to ensure that the images you capture are in focus.
This is especially important when photographing faint objects, as they can be easily blurred if the camera is not properly focused.
With a DSLR camera, you can simply adjust the settings to make sure that the image is in focus.
Overall, using a DSLR camera with a telescope can be a great way to capture beautiful, high-quality images of the night sky.
With a DSLR and telescope combination, you can capture stunning images of distant objects that you can share with friends and family.
Plus, with the wide field of view and improved low-light performance offered by DSLR cameras, you can capture more of the night sky in one shot, and ensure that your images are in focus.
Final Thoughts
By combining the power of a DSLR camera and telescope, you can take stunning images of distant objects in the night sky.
With the right preparation and settings, you can capture beautiful images that you can share with friends and family.
So why not give it a try? Gather your DSLR camera and telescope and capture the gorgeous night sky!.