Do you have a Canon DSLR camera, but are unsure how to safely remove the battery? If youre looking for a step-by-step guide on how to correctly remove the battery, then youve come to the right place.
In this article, well give you an overview of removing the battery from a Canon DSLR, as well as provide step-by-step instructions on how to safely remove and store the battery.
Along the way, well provide helpful tips on proper battery removal techniques to ensure you get the best performance and life out of your camera battery.
So, lets get started!.
Table of Contents
Short Answer
To remove the battery from a Canon DSLR camera, first make sure to power the camera off and remove any lens or accessories attached to the camera.
Then, locate the battery cover on the bottom of the camera and slide it open to reveal the battery.
Gently press down on the battery while simultaneously sliding it out of the camera.
Finally, replace the battery cover and store the battery in a safe place.
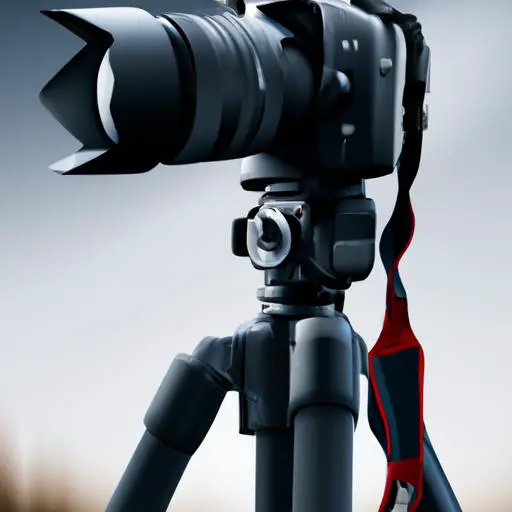
Overview of Removing the Battery from a Canon DSLR
Removing the battery from a Canon DSLR is a fairly straightforward task that can be done in just a few steps.
By following these steps, you can ensure that the job is completed safely and effectively.
First, youll need to turn the camera off and remove any lenses that are attached.
This will help ensure that no power is going to the camera while youre working with the battery.
Next, youll need to locate the battery compartment, which is usually located on the bottom of the camera.
Once youve identified the compartment, youll need to press the button or slide the latch to open it.
Once the battery compartment is open, you can carefully remove the battery.
Be sure to take your time during this step and make sure that you dont damage either the battery or the camera.
Once the battery is removed, you can safely store it away until you need it again.
By following these simple steps, anyone can quickly and easily remove the battery from their Canon DSLR.
Its a simple process that doesnt require any special tools or technical knowledge, making it an ideal task for beginners and experienced photographers alike.
With the right instructions, anyone can master the task of removing the battery from their Canon DSLR in no time.
Step 1

Removing the battery from a Canon DSLR is an easy process that requires minimal effort.
To get started, the first step is to turn the camera off and remove the lens.
This should be done carefully to avoid damage to the camera and lens.
To avoid any potential damage, it is important to ensure that the camera is firmly secured to a stable surface before attempting to remove the lens.
Once the camera and lens are secured, the next step is to locate the battery compartment.
This is usually located on the bottom of the Canon DSLR and is easily identifiable by the symbols printed on the cameras body.
Once the compartment is located, press the button or slide the latch to open the compartment.
It is important to ensure that the compartment is securely closed before attempting to remove the battery.
Finally, carefully remove the battery from the compartment.
It is important to do this slowly and carefully to avoid damaging the battery or the camera.
Once the battery is removed, make sure to store it in a safe and secure place to ensure it does not become damaged or lost.
With these simple steps, anyone can quickly and easily remove the battery from their Canon DSLR.
It is important to remember to always handle the camera and battery with care to avoid any damage or accidents.
Step 2
Once the camera is turned off and the lens is removed, the second step is to locate the battery compartment.
This is usually located on the bottom of the camera and can be identified by a small latch or button.
It may be necessary to look closely, as some models have the battery compartment in an out of the way location.
Once found, press the button or slide the latch to open the compartment.
It is important to be gentle with this step, as any unnecessary force may damage the camera.
Once opened, the battery should be easily visible and can be carefully removed from the compartment.
It is important to always handle the battery with caution, as it can be fragile.
When lifting the battery out of the compartment, make sure to keep a firm grip on it and avoid dropping it.
With these steps, anyone can quickly and easily remove the battery from their Canon DSLR.
Step 3

Once you have located the battery compartment, it is time to remove the battery.
Depending on the type of Canon DSLR you have, the procedure may vary slightly.
For most models, you will need to press a button or slide a latch to open the compartment.
This button or latch is usually located near the edge of the compartment and may be marked with an icon or text that tells you to press or slide it.
Once the latch is released or the button is pressed, the compartment will open.
Be sure to use caution when opening the compartment, as the battery is under pressure and can potentially move quickly and cause injury.
Once the compartment is open, carefully remove the battery from the compartment.
It is important to be gentle and not force the battery out, as this can damage the battery and the camera.
When removing the battery, you should also pay attention to the orientation of the battery.
Some batteries are designed to be installed a particular way, so you will want to make sure you are putting the battery back in the same way.
Once the battery is removed, the compartment can be closed and the lens can be reattached.
Step 4
The fourth and final step in removing the battery from a Canon DSLR is to carefully remove the battery from the compartment.
It is important to handle the battery with caution, as it can be damaged if mishandled.
One should also avoid touching the contacts of the battery, as this can also cause damage.
It is best to use a pair of tweezers or a cotton swab to handle the battery, as this will minimize the chance of causing any damage.
Once the battery is removed, it is a good idea to store it somewhere safe and away from direct sunlight.
This will ensure the battery stays in good condition and will last for a long time.
Step 5

The fifth step in the process of removing the battery from a Canon DSLR is to carefully remove the battery from the compartment.
Before doing so, it is important to make sure that the battery is not damaged or faulty.
To do this, check the batterys contacts and ensure that there are no visible signs of wear or damage.
If the battery appears to be in good condition, carefully remove the battery from the compartment.
Depending on the model of the camera, the battery may be secured in place with a latch or clip.
If this is the case, press the latch or clip to release the battery before gently lifting it out of the compartment.
Once the battery has been removed, it can be safely stored away from the camera until it is ready to be used again.
Tips for Proper Battery Removal
Removing a battery from a Canon DSLR is a simple task, but its important to do it properly to ensure safety and avoid any damage to your equipment.
Here are a few tips for proper battery removal from your Canon DSLR: * Always power down your camera before attempting to remove the battery.
This will help avoid any accidental damage or short-circuiting due to an accidental power surge or current while removing or replacing the battery.
* Be sure to locate the battery compartment before attempting to remove the battery.
This is usually located on the bottom of the camera, but it can vary depending on the model.
* If youre having trouble locating the battery compartment, consult your user manual or check the manufacturers website for more information.
* When you find the battery compartment, press the button or slide the latch to open the compartment.
* Handle the battery with care when removing it from the compartment.
This will help avoid any accidental damage to the battery or your camera.
* Once removed, store the battery in a safe, cool, and dry place.
This will help extend the life of the battery and ensure its ready to go when you need it.
Following these tips can help you properly, safely, and quickly remove the battery from your Canon DSLR.
Final Thoughts
Removing the battery from a Canon DSLR is a straightforward process that anyone can do.
By following the five steps outlined in this guide, you can easily remove the battery and get back to taking amazing photos.
Remember to always use caution when handling the battery, and to refer to the manufacturers instructions if you have any questions.
Now that you know how to remove the battery from your Canon DSLR, why not try it out and see how easy it is?.