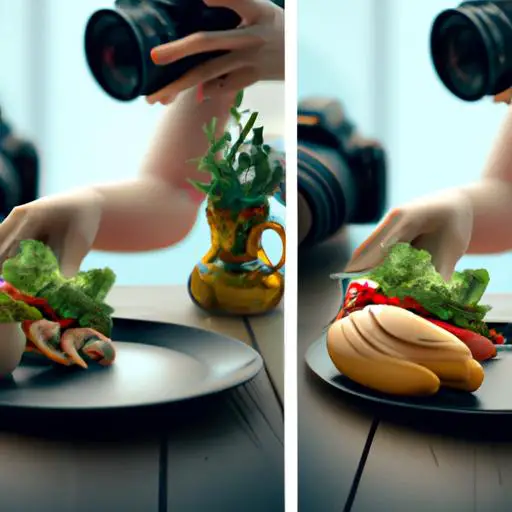
Are you looking to take your food photography skills to the next level? With the right tips and a little practice, you can create stunning food photos with just your iPhone.
From understanding the basics of photography to experimenting with different angles, this guide will cover everything you need to know to do food photography with your iPhone.
Read on to learn how to find the right light source, compose the shot with grid view, adjust exposure and other settings, apply background blur, and practice to perfect your photos.
Table of Contents
Short Answer
Food photography with an iPhone can be a great way to capture a delicious meal or snack.
Start by finding a good spot with natural lighting and set up your iPhone on a stable surface.
Make sure the angle of the camera is flat to the food and adjust the cameras settings for the best possible photo.
Experiment with the different filters and editing features available to find the best look for your food photography.
Understanding Basic Photography Principles
Taking great food photos with your iPhone starts with understanding the basic principles of photography.
Lighting is key when it comes to food photography, so youll want to make sure you find a good light source.
Natural light is usually best, so try to take your photos near a window or outside.
You can also use artificial lights, such as lamps, to create interesting and unique lighting effects.
Another important factor is composition.
Youll want to make sure your food looks balanced and appealing in the photo.
You can use the grid view on your iPhone camera to help you compose your shot.
This will help you keep lines straight and create a pleasing image.
Experiment with different angles and perspectives to find the best viewpoint for your photos.
When it comes to settings, youll want to adjust your exposure and other settings to make sure your photo looks perfect.
You can also use the background blur to make your food stand out and give the photo more depth.
This can be done with the portrait mode on your iPhone, or with an app like Afterlight.
Finally, practice, practice, practice! Taking great food photos is a skill, and the more you do it, the better youll get.
So dont be afraid to experiment and have fun with it! With a bit of practice, youll soon be taking stunning food photos with your iPhone.
Finding the Right Light Source

Finding the right light source is essential for taking great food photos with your iPhone.
Natural light is always the best option for food photography, as it will make the colors of the food stand out and create a bright, vibrant image.
Try to look for a light source that is not too harsh or too soft the ideal light should be even and diffused.
If you dont have access to natural light, you can also opt for artificial light sources such as lamps or overhead lights.
However, be sure to avoid direct light, as this will create unwanted shadows and can make the food look flat.
Experiment with different light sources to see what works best for you.
Composing the Shot with Grid View
When it comes to food photography, composition is key.
To help you compose the shot and get the best angles, the grid view in your iPhones camera is a great tool to utilize.
By enabling grid view, you can easily align your food in the center of the frame or along one of the lines.
This helps create a balanced and aesthetically pleasing image.
Additionally, using the grid view can help you find interesting angles to capture your food from.
Try shooting from above or from the side for a more interesting perspective.
The grid view can also be used to practice the rule of thirds, a composition technique that involves dividing the frame into thirds and placing the subject at the intersection of two of the lines.
This creates an eye-catching and balanced image.
Adjusting Exposure and Other Settings

Taking great food photos with your iPhone requires you to adjust the exposure and other settings for the perfect shot.
Exposure is the amount of light that is allowed to reach the cameras image sensor.
When you adjust exposure, you can make the food look brighter or darker, depending on which direction you move the slider.
To adjust exposure while taking a photo, open up your camera settings and look for the exposure option.
Slide the exposure down to darken the photo and up to brighten it.
If youre having trouble getting the right exposure, try using the Auto setting, which will adjust exposure depending on the light in the environment.
In addition to adjusting exposure, you can also adjust other settings to get the perfect food photo.
Focus is an important setting to pay attention to, especially if youre using a shallow depth of field.
To adjust focus, simply tap the area of the photo you want to focus on.
You can also adjust the white balance, which helps create a more natural-looking photo.
To adjust white balance, open up your camera settings and look for the white balance option.
Finally, you can adjust the shutter speed to control motion blur.
To adjust shutter speed, open up your camera settings and look for the shutter speed option.
A slower shutter speed will create more blur, while a faster shutter speed will freeze motion.
Play around with different shutter speeds to get the effect you want in your photo.
By adjusting exposure and other settings, you can create stunning food photos with your iPhone.
Remember to experiment with different settings to find the right combination for the perfect photo.
Applying Background Blur
When taking food photos with your iPhone, one of the most effective techniques to make your food stand out is to use the background blur.
This is a feature on iPhones that allows you to blur the background of your photos, making the food in the foreground appear sharper and more vibrant.
To apply background blur, start by tapping the screen to focus on the food in the center of the frame.
Then, use your finger to swipe on the parts of the image that you want to blur.
This will blur the background and make the food in the foreground appear more detailed and vivid.
You can adjust the amount of blur by swiping your finger up or down, and you can also adjust the position of the blur by swiping left or right.
With a bit of practice, youll soon be able to take amazing food photos with your iPhone!.
Experimenting with Different Angles

When it comes to food photography with your iPhone, experimenting with different angles is key for creating interesting and engaging shots.
Different angles can help you highlight certain features of your food, such as texture or even its shape.
You can also use different angles to create visual interest in your photos, such as a high angle to make your food look larger than life.
To start, try taking photos from different angles and distances.
For instance, if you have a plate of food, you can take a photo from overhead to capture the whole plate, or you can get close and capture details of individual ingredients.
Playing around with different angles will help you find the most interesting and aesthetically pleasing shots.
You can also use the grid view on your iPhones camera to help you compose your shots.
This will help you keep the horizon and other elements in the frame straight and level.
You can also use the grid view to line up different elements in the photo, such as food and utensils, to create a balanced and visually pleasing composition.
By experimenting with different angles and using the grid view, you can create stunning food photos with your iPhone.
With a bit of practice and patience, youll soon be taking photos that youll be proud to share with the world.
Practicing to Perfect Your Photos
Practicing to Perfect Your Photos is the key to mastering food photography with your iPhone.
Taking multiple shots of the same food item can help you find the perfect angle and composition for each dish.
Experimenting with different angles, backgrounds, and lighting can help you get the best shot.
You can also experiment with different settings to adjust the exposure, focus, and other settings to capture the perfect photo.
Using the grid view in your camera will help you compose the shot, and using the background blur feature will help your food stand out in the photo.
Its also important to practice taking photos in different light.
Natural light is always the best for food photography, but if youre shooting indoors you can also use lamps or other artificial lights to help you get the perfect shot.
Adjusting the brightness and contrast in your photos can also help you create the perfect image.
Finally, practice is the key to mastering food photography.
Taking multiple shots and experimenting with different angles, backgrounds, settings, and lighting can help you become a pro at taking photos with your iPhone.
With a bit of practice, youll soon be taking stunning food photos with your iPhone.
Final Thoughts
Food photography with your iPhone doesnt have to be difficult.
With a bit of practice, you can learn how to take stunning photos of your dishes.
Start by understanding some basic photography principles, and then experiment with different angles and light sources.
Use the grid view in your camera to help you compose the shot, and adjust the exposure and other settings to make sure your photo looks perfect.
Finally, use the background blur to make your food stand out.
Now that you know how to do food photography with your iPhone, get out there and start taking some amazing photos of your delicious dishes!.